The Ultimate Juicy Peach Raspberry Cake: A Love Letter to Summer Baking (With All My Kitchen Disasters Included)
Introduction: The Cake That Started With a Kitchen Catastrophe
Let me take you back to that fateful summer afternoon when I first attempted what would become my signature Juicy Peach Raspberry Cake. The air was thick with humidity, my tiny Brooklyn kitchen felt like a sauna, and I was armed with nothing but ambition and a bag of slightly overripe peaches from the farmer’s market.
I had visions of creating one of those picture-perfect cakes you see in gourmet magazines – golden crusted with artfully arranged fruit glistening like jewels. What emerged from my oven two hours later resembled something closer to a geological formation than a dessert. The peaches had sunk to the bottom, the edges were burnt, and the center… well, let’s just say it had the structural integrity of pudding.
But here’s what they don’t tell you in most baking blogs: the road to every great recipe is paved with culinary disasters. This cake became my white whale, my summer obsession. Over the next six weeks, I made it fourteen times (yes, I kept count). There was the version where I forgot sugar (surprisingly savory!), the one where I mistook salt for sugar (do not recommend), and the infamous “Great Butter Explosion of 2021” when I tried to speed-soften butter in the microwave.
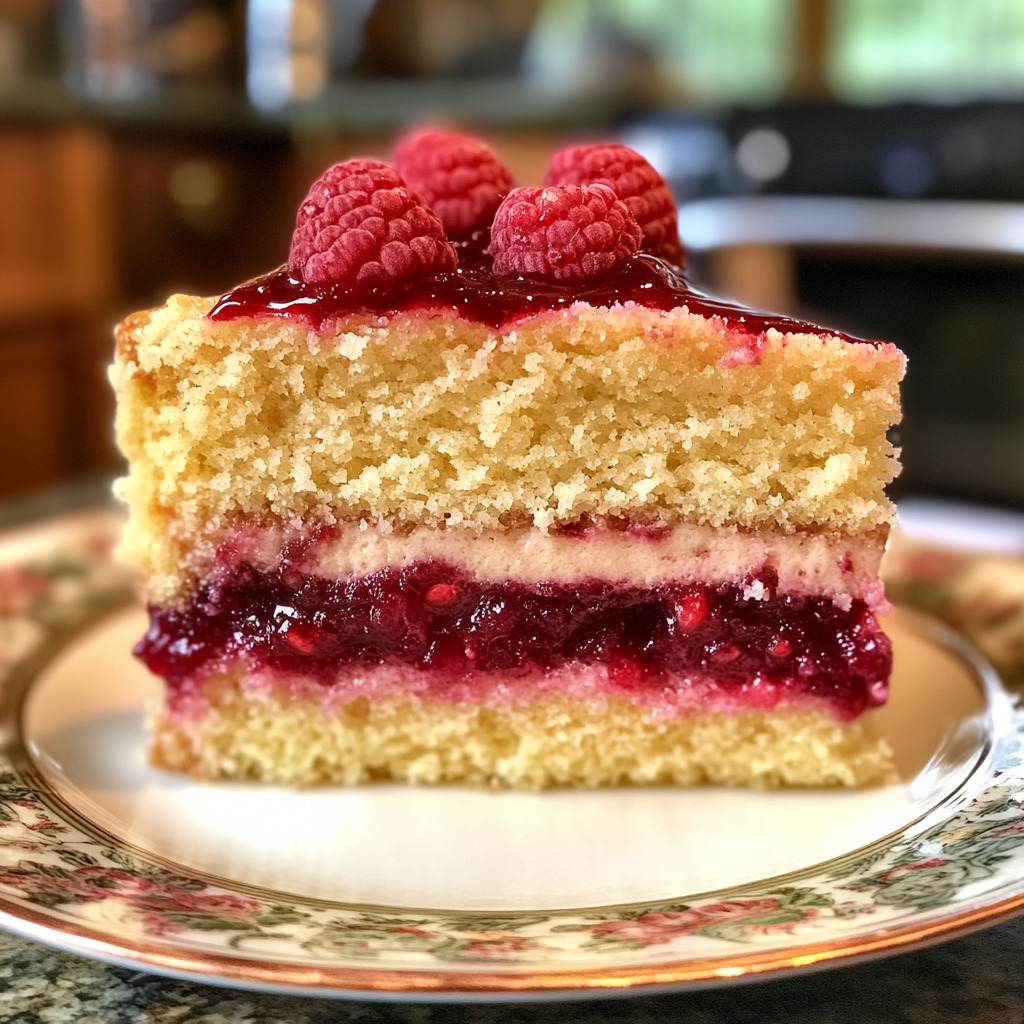
Through all these misadventures, I learned not just how to make a great peach raspberry cake, but why this particular combination works so magically together. The peaches bring that lush, honeyed sweetness, while raspberries provide the perfect bright counterpoint. When baked together in a tender, buttery cake, they create something greater than the sum of its parts.
Why This Cake Deserves a Spot in Your Recipe Box
Before we dive into the nitty-gritty, let’s talk about what makes this cake so special:
✅ It’s deceptively simple – Unlike fussy layer cakes that require precision piping and perfect crumb coats, this is a “rustic beauty” that celebrates imperfections. Lopsided? Call it “artisanal.” Fruit sank to the bottom? Now it’s a “surprise filling.”
✅ Seasonal flexibility – While peaches and raspberries are summer stars, this formula works year-round. Try apples and cranberries in fall, pears and blackberries in winter, or apricots and blueberries in spring.
✅ Texture paradise – The contrast between the tender crumb, jammy fruit pockets, and slightly crisp sugar topping creates a symphony in every bite.
✅ Leftover magic – If by some miracle there are leftovers (unlikely), this cake actually improves overnight as the flavors meld. Day-old slices make incredible French toast or bread pudding too.
✅ Nostalgia in every bite – There’s something about fruit desserts that transport us back to childhood summers. This cake captures that feeling perfectly.
The Science Behind the Perfect Fruit Cake
After my many (many) failed attempts, I became obsessed with understanding why certain versions worked while others flopped. Here’s what I learned:
Fruit Chemistry 101:
Peaches contain enzymes that can break down gluten if not properly managed. That’s why my early versions turned gummy – the fruit was too ripe and released too much liquid. The solution? Use slightly firm peaches and toss them with a bit of flour before adding to the batter.
The Maillard Reaction:
That beautiful golden crust comes from the Maillard reaction – the same process that gives seared steaks their flavor. The key is using enough sugar on top to promote caramelization without burning.
Gluten Development:
Overmixing leads to tough cakes because it develops too much gluten. I learned to mix just until the flour disappears – a few lumps are actually good!
The Ingredients: A Deep Dive
Let’s geek out over each component and why it matters:
Flour (1 ½ cups all-purpose)
After testing every flour under the sun, I found all-purpose strikes the perfect balance between tenderness and structure. For a lighter crumb, you can substitute ½ cup with cake flour. Important: Measure by weight (180g) if possible – volume measurements vary wildly.

Leaveners (1 ½ tsp baking powder)
This provides the lift. Make sure yours is fresh – old baking powder leads to sad, flat cakes. Test it by mixing 1 tsp with hot water – it should bubble vigorously.
Butter (½ cup unsalted)
European-style butter (like Plugrá) makes a noticeable difference with its higher fat content. For ultimate flavor, brown the butter first (let it cool before using).
Sugar (¾ cup granulated + 2 tbsp brown)
The granulated sugar sweetens while the brown sugar on top creates that craveable caramelized crust. For deeper flavor, try turbinado or demerara for the topping.
Eggs (2 large)
Room temperature eggs incorporate better. Don’t have time to wait? Submerge them in warm water for 5 minutes.
Dairy (½ cup whole milk)
The fat in whole milk contributes to tenderness. For extra richness, substitute buttermilk or even crème fraîche thinned with a bit of milk.
Fruit (2 peaches + 1 cup raspberries)
Peach selection is crucial – they should yield slightly to pressure but still feel firm. For raspberries, fresh are ideal but frozen work surprisingly well (no need to thaw).
Step-by-Step Perfection (With All My Mistakes Highlighted)
1. Mise en Place (The Step I Used to Skip)
Gather all ingredients and tools before starting. I can’t tell you how many times I got halfway through only to realize I was out of eggs. Now I use the “claw method” – literally touching each ingredient as I check it off.
2. Preparing the Pan
Grease a 9-inch springform pan thoroughly, then line the bottom with parchment. My early attempts stuck disastrously until I started using this combo. For extra insurance, you can dust the greased pan with flour.
3. Dry Ingredient Mix
Whisk together:
- 1 ½ cups (180g) all-purpose flour
- 1 ½ tsp baking powder
- ½ tsp salt
- Optional: ¼ tsp cinnamon or cardamom
Sift if your flour is lumpy. This ensures even distribution of leaveners.
4. Creaming Butter & Sugar
Using a stand mixer with paddle attachment (or sturdy hand mixer), beat:
- ½ cup (113g) softened butter
- ¾ cup (150g) sugar
For 3-5 minutes until pale and fluffy. This incorporates air for lift. Scrape bowl frequently – I can’t count how many times I found uncreamed butter stuck to the bottom.
5. Incorporating Eggs
Add eggs one at a time, mixing fully after each. Then mix in:
- 1 tsp vanilla extract
- Optional: ¼ tsp almond extract
If the mixture looks curdled (common if eggs are cold), add 1 tbsp of your dry ingredients to stabilize.
6. Alternating Dry & Wet
Add dry ingredients in 3 additions, alternating with:
- ½ cup milk in 2 additions
Mix just until combined after each. The batter will be thick – this helps prevent fruit from sinking.
7. Preparing the Fruit
Toss:
- 2 sliced peaches (about 2 cups)
- 1 cup raspberries
With 1 tbsp flour. This absorbs excess juice.
8. Assembling
Spread batter in prepared pan. Arrange fruit on top, pressing slightly into batter. Sprinkle with:
- 2 tbsp brown sugar
- Optional: 1 tbsp turbinado sugar for extra crunch
9. Baking
Bake at 350°F (175°C) for 45-55 minutes. Rotate pan halfway through. Cake is done when:
- Golden brown
- Fruit is bubbling
- Toothpick comes out clean (except for possible fruit juice)
10. Cooling
Let cool in pan 15 minutes, then run a knife around edges and remove springform ring. Cool completely before slicing… if you can wait.
Troubleshooting: Every Problem I’ve Encountered (And Fixed)
Problem: Soggy bottom
Solution: Elevate the pan by baking on a preheated sheet pan. Also, make sure fruit isn’t too ripe.
Problem: Burnt edges
Solution: Use an oven thermometer to check accuracy. Tent with foil if browning too quickly.
Problem: Dense texture
Solution: Check baking powder freshness. Don’t overmix batter.
Problem: Fruit all sunk
Solution: Use thicker batter (reduce milk slightly) and toss fruit in flour.
Next-Level Variations
Boozy Peach Raspberry Cake
Add 2 tbsp bourbon or amaretto to batter. Soak baked cake with peach liqueur syrup.
Nutty Crunch Version
Add ½ cup chopped toasted almonds to batter. Sprinkle sliced almonds on top before baking.
Lemon-Thyme Twist
Add 1 tbsp lemon zest to batter. Scatter fresh thyme leaves over fruit.
Ginger-Spiced
Add 1 tsp ground ginger to dry ingredients. Top with crystallized ginger pieces.
Serving Suggestions Beyond the Basics
Breakfast Upgrade
Serve slightly warmed with Greek yogurt and honey drizzle.
Elegant Dinner Party
Pair with rosemary-infused whipped cream and edible flowers.
Ice Cream Sandwich
Slice cooled cake horizontally, fill with vanilla ice cream, refreeze, then slice into bars.
Storage & Preservation
Room Temperature:
Keeps well covered for 2 days. Refresh in 300°F oven for 5 minutes.
Refrigerator:
Up to 5 days. Bring to room temp or warm slightly before serving.
Freezing:
Wrap individual slices tightly in plastic, then foil. Freeze up to 3 months. Thaw overnight in fridge.
The Emotional Payoff: Why This Cake Matters
After all my trials (and errors), this cake has become more than just a dessert. It’s the one I bring to summer potlucks, the one my nieces request for birthdays, the one that makes my stoic father-in-law actually smile. There’s something magical about how the simple combination of seasonal fruit, butter, and sugar can create such joy.
I’ll never forget the time I made it for my best friend after her divorce. We sat on her fire escape at 2am, eating warm slices straight from the pan, the raspberries like little bursts of brightness in the dark. That’s the power of a good cake – it’s not just food, it’s edible comfort.
So here’s my challenge to you: Make this cake. Mess it up if you need to. Make it again. Put your own spin on it. And most importantly, share it with someone you love. Because the best recipes aren’t about perfection – they’re about the stories we create while making them.
Now tell me – what’s your favorite baking fail that turned into a triumph? And more importantly… can I come over for cake?